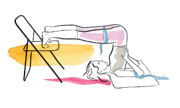
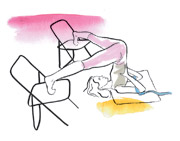
Improper position of the pelvis in the sitting pose is injurious to health. We spend a lot of time at a work desk, sitting improperly in most cases. For example, the typical position of women is as follows: the pelvis is tilted forward, lower back caved. In other words, most of women are sitting on the backs of the thighs, and the saddest thing is that in this static – and wrong! – posture we can spend the whole day! Not only our spine suffers from it, but the internal organs as well. The link between them is simple: correct spine position = proper organs functioning; bad position = improper functioning. Another extreme is when you are rolling back on the coccyx and sacrum, which is also bad.
What Is The Right Sitting Posture?
The one when we sit exactly on the vertices of the sciatic bones. If the buttocks are small, one will feel how the bones “dig” in the chair, if you sit properly. But actually any person can identify the right position for sitting. You need to keep your pelvis balanced, not tilting it back or forward.
Our internal organs are connected with the spine and its alignment and stretching up leads to the lifting of the internal organs. Although it may be difficult to work always maintaining the correct pose, yet you need to take it once in awhile just to let your spine and internal organs get back to normal state. Also it is recommended to take a break from time to time from your work to get up and have some walk around the room, or even outside. If the condition of your spine is already far from being well, do the following asana sequence to correct your posture and tone the spine and internal organs. This will also prevent the development of scoliosis.
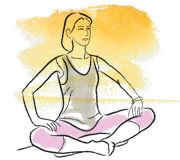 1. Baddha Konasana, back against the wall
The entire back – from the coccyx to the neck – should be pressed to the wall. Press your hands on the knees, directing them to the floor. But at the same time keep all the back (especially lower back) pressed against the wall. This is a variation of the original baddha konasana.
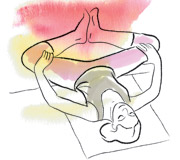 2. Another variation of baddha konasana – lying on the back, with feet on the wall
Lie on your back and place the legs (their back sides) on the wall. Bend your legs and bring them into position of baddha konasana. Press your knees with hands, bringing them closer to the wall, and simultaneously press down the waist to the floor.
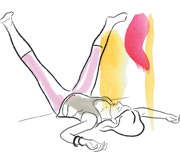 3. Variation of Upavishtha Konasana with feet on the wall
This to be continued from the baddha konasana on the wall (#2): stretch your legs up the wall and spread to the sides for two or three widths of the pelvis. The inner sides or your hips should be pressed to the wall, and the back hip surfaces should be stretched from inside to outside. Your toes, knees and the mid-hips should be on a single line. Keep your spine on the floor.
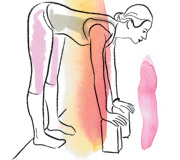 4. Uttanasana at the wall, hands on yoga blocks
Put your hands on the blocks and put the feet just next to the wall (heels must rest against the angle between the floor and the wall, and the sitting bones should cling to the wall). Yoga blocks are placed right under your shoulders. Push your arms off the blocks, move the shoulders away from the head, direct the shoulder blades towards the waist and the sternum forward; sag the upper back. Press the heels against the floor, pull the kneecaps, extend the front of the thighs from the knee to the pelvis, and extend the back sides of the thighs from inside to outside. Raise the internal sides of the ankles; pull in the sacrum, and along with it stretch the whole spine forward, direct the legs backward to the wall. If you do everything right, there will be a feeling as if the internal organs move upward to the spine and the diaphragm. Uttanasana is helpful for stiff shoulders and upper back.
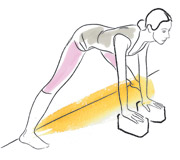 5. Prasarita Padottanasana at the wall
The technique is similar to the previous asana, but since the legs are set wide apart, you need to press the outer edges of the feet more to the floor. Move the shoulders away from your head, direct the shoulder blades towards the waist and the sternum forward. You will feel how your abdomen stretches.
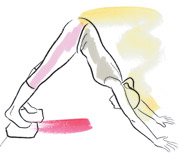 6. Adho Mukha Svanasana with feet on the blocks
Do the regular svanasana, but place your feet on yoga block resting against the wall. Pull the kneecaps up, and move the hips towards the wall. This yoga pose creates the sensation of belly emptiness, and that the internal organs “fall” on the spine and diaphragm.
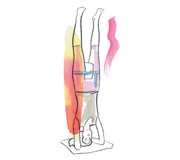 7. Sirsasana with a block between thighs
There are two ways to enter the pose:
– Place the block between the thighs, fasten the belt around them and get into the asana. This variation requires some practice.
– You take the sirshasana pose and ask someone to put the block between your thighs, and then tighten them with a belt or a yoga strap.
The idea of this pose is to let the internal organs go down – from the perineum to diaphragm. Although it is difficult with a brick, but try to stretch your legs.
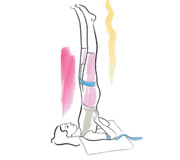 8. Sarvangasana with a brick (yoga block) between the thighs
The technique is the same as in sirshasana, except the fact that you stand on your shoulders instead of your head; keep the neck relaxed.
9. Halasana with feet on a chair
Do the sarvangasana, then lower your legs on a chair and remove a block from between your hips. Starting with your toes, lengthen the front of the thighs from the knee to the pelvis, pulling the femoral head into the pelvis. The sacrum should be pulled to the heels to create a counter-movement.
You will need a second chair here. From halasana spread your legs and place them on the chairs. Other details are the same as in the halasana.
11. Parsva Eka Pada Sarvangasana
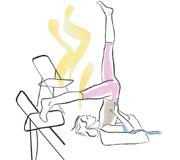 Raise your left leg straight up; leave the right leg in the same position. Tighten the left thigh inward, and extend the outward right thigh from the knee to the pelvis. Then change your legs.
This simple asana sequence will help you to sit properly and to maintain a correct posture in general.

