OK, we continue the series of “yoga at home” posts.
Here I’m going to show you a basic yoga workout you can do at home. It is rather simple and suitable for beginners.
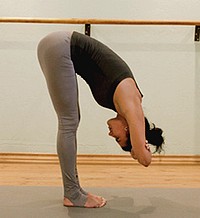
1. Stand erect, with your hands at your sides; relax your body. With inhale raise your hands above your head, and stretch your whole body upward. Exhaling, bend forward and “hang”, breathing normally. Stay in this “hanging” position for 5-8 full breaths (if you feel it too hard remaining in this pose due to strong blood inflow, then do only 2-3 breaths and repeat the pose a couple of times). With inhale straighten up, raising the hands above the head, and, exhaling, lower them at the sides.
2. Adho Mukha Svanasana and Urdhva Mukha Svanasana (downward and upward facing dog poses)
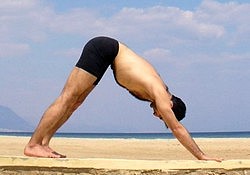 There are two ways you come into the pose:
- From standing on your hands and knees
- From standing straight, then bending forward, and placing the palms on the floor at a distance in front of you.
Whatever way you choose, you need to come into a position, when your palms and feet touch the floor, and the body forms a kind of “mountain”. This is the starting position (Adho Mukha Svanasana).
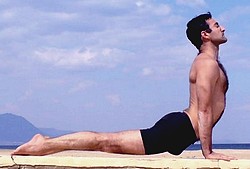
Exhale, and move into Urdhva Mukha Svanasana, inhaling. You need to lower your body by bending arms and knees and by a sliding movement, push your body forward, deflecting the back, and raising the head. Thus you will get into Urdhva Mukha Svanasana. Than with exhale move backwards into Adho Mukha Svanasana.
Repeat 3-5-7 times (whatever is suitable for you).
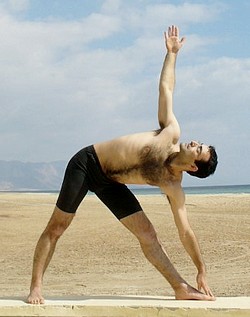
3. Trikonasana or the triangle pose
 The starting position is a five pointed star pose, when your legs are set apart and your arms stretched to the side, so the body resembles a star.
Relax, inhale, then exhale, and turn your head and the right foot to the right at 90 degrees. Turn your left foot to the right but at 30-45 degrees. Open your chest. Bend to the right side, trying to reach the right foot with your right hand. It is even better to put the hand on the floor at the external side of the right foot. Your left hand points to the ceiling, the chest is open, the eyesight is directed to either your left hand or to the ceiling. Remain in this pose for 5-8 full breaths, then return to the starting position, and repeat to the left side.
4. Bhujangasana or the cobra pose
Lie flat on your abdomen, your hands are at the sides; relax. Place your palms on the floor just near or under your shoulders; keep your forehead on the floor as well. With inhale raise your head slowly, without using your hands. Once you cannot proceed with the help of your neck and back muscles only, engage the hands to lift the upper part of your body. Keep the thighs and the pubic bone on the floor! You can keep your head up or tilt the head back.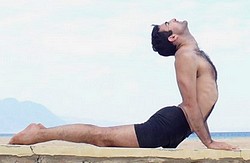
Remain in this final position for 3-5 breaths then return to the initial stage. Repeat 3 times.
5. Paschimottanasana or the seated forward bend pose
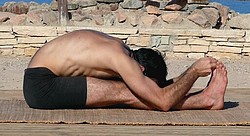 Sit on the floor and stretch your legs in front of you. Keep them straight like sticks all the time! Your toes are pointed to the ceiling. Inhale and raise your hands above the head. With exhale lean your body forward, trying to reach your toes/ankles/shins with your hands. Once you done it, hold this position breathing normally for 1-3-5 minutes (take any number you feel comfortable with). With inhale raise your arms above your head again, and lower them to the thighs, exhaling. Repeat three times.
6. Ardha Matsyendrasana, the half spinal twist pose
Read about Ardha Matsyendrasana here.
7. Navasana or the boat pose
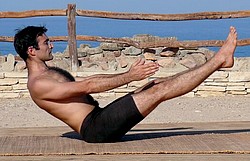 Sit like in Paschimottanasana, keeping your spine straight. Lean backward, lifting your straight legs above the floor at 45 degrees. Your eyes look forward; your arms are stretched forward as well, parallel to the floor. Keep the pose for 5-8 full breaths, and then return to the starting position.
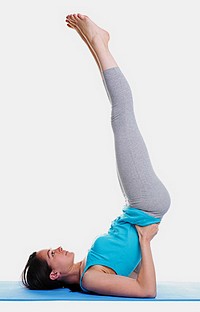 8. Viparita Karani or the upside-down seal pose
Lie on your back with your legs slightly apart and your arms at the sides of your body. Bend the knees, lifting and pulling the legs to the abdomen. In this position your spine is almost fully straightened on the floor. Now, helping yourself with the arms, lift the pelvis, placing your elbows on the floor to support it. Once you reached this position, straighten the legs, pointing them towards the ceiling. Keep your head and neck on the floor, but without strain. Your body is supported by the hands. Breathe normally, mainly by the abdomen. Remain in this pose for 2-5 minutes, then with exhale bend your knees, lower the pelvis to the floor, straighten your legs, placing them on the floor; put your hands on the sides of your body at the floor, and relax.
9. Shavasana or the corpse pose
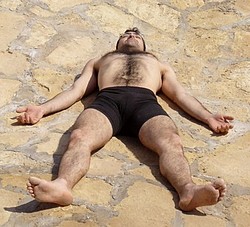
You continue lying on the floor after the Viparita Karani pose. Imagine your body to be warm and heavy; make it feel like a liquid or something jelly-like – this will help you relax your muscles, which is the idea of this pose. Also try focusing your attention of the breathing rather than catching the flow of random thoughts. You need to fully relax your body and mind to restore the free energy flow throughout your body.
 This is a basic yoga workout at home for beginners; there are many of such routing and you will be able to adjust yoga poses to your needs in the future once you get some experience in yoga practice. Yes, this is not a 10 minute yoga workout at home (and I doubt there is such that can work well, saving, probably the dynamic Surya Namaskar practice). This routine will probably take around 30-40 minutes of your time, which is not a lot; but it will help you start doing yoga regularly, and significantly improve your health both physical and mental.
Before you start doing yoga consult with a doctor to ensure there are no contraindications on your side.

